
Animator 란?
우리가 익히 알고 있는 '애니메이션'이라는 단어 자체를 유니티에서 사용하는 용어로 표현하면 '애니메이션 클립'이 될 것이다. 특정 행동을 동작으로 표현하는 일련의 변화 과정을 하나의 애니메이션 클립으로 관리한다. 구성요소를 하나하나 뜯어보자.
- Animation view

위와 같이 Unity editor 상단 Window 탭을 통하거나 Project view 상의 애니메이션 에셋을 더블클릭하는 것으로 아래와 같은 Animation view를 이용할 수 있다.

Animation view에서 프레임 단위로 애니메이션 클립을 만들고 편집할 수 있는데, 기본적인 게임 오브젝트의 동작 표현과 더불어 게임 오브젝트의 위치, 머티리얼 색상, 빛의 밝기, 사운드 볼륨 등 Inspector에서 편집 가능한 모든 프로퍼티를 애니메이션하거나 임의의 값으로 변경하는 것이 가능하다.
- Animation Controller
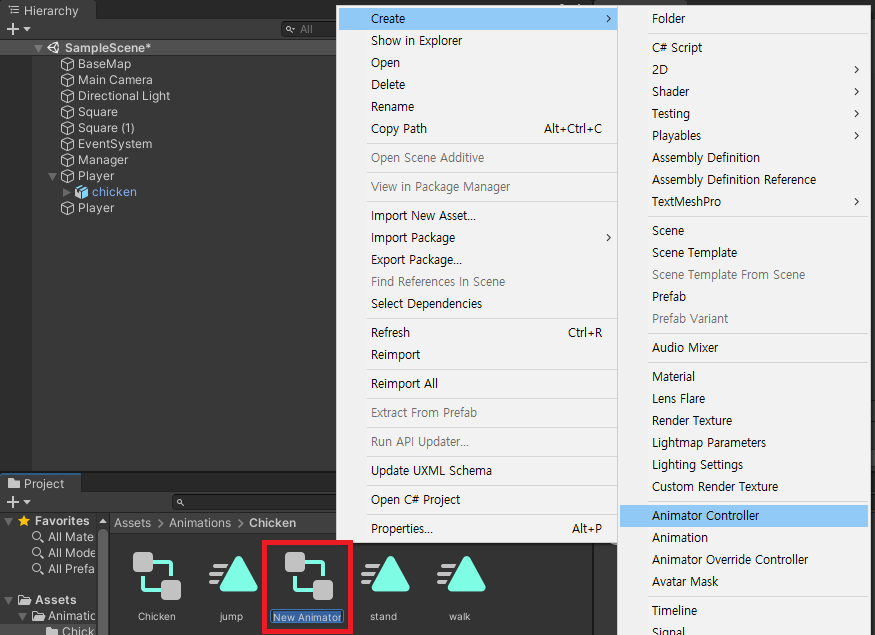
위와 같은 방식으로 Animator controller를 생성할 수 있다.
Animator controller 에셋은 FSM(유한 상태 머신)을 사용하여 재생할 애니메이션 결정 상태도를 표현하는 에셋이다. 앞서 말한 것처럼 Animator에 Animator controller를 연결하여 그 내용을 참고해 게임 오브젝트에 실제로 애니메이션을 적용하는 컴포넌트이다. 즉, Animator controller라는 애니메이션을 재생하는 방법에 대한 설계도를 이용하여 Animator라는 기계가 동작하여 실제 애니메이션을 재생하는 것이다. 애니메이션을 게임에서 재생하기 위해선 Animator controller와 Animator component 모두가 필요하다.
- Animation


위와 같은 방식으로 Animation을 생성할 수 있다.
Animator Controller가 설계도이고, Animator가 작동하는 기계라면 Animation은 기계의 동작을 나타낸다.

Animation은 실제 기계가 어떻게 동작하는지를 입력하는 부분으로 각 분기에서 수행해야할 동작을 입력할 수 있다.
우리가 알고 있는 캐릭터들의 모션이 여기서 결정되는 것이다.
- Transition condition

우리가 생각하는 것처럼 기계가 실제로 동작하도록 시동을 거는 방식은 두가지로 나뉜다.
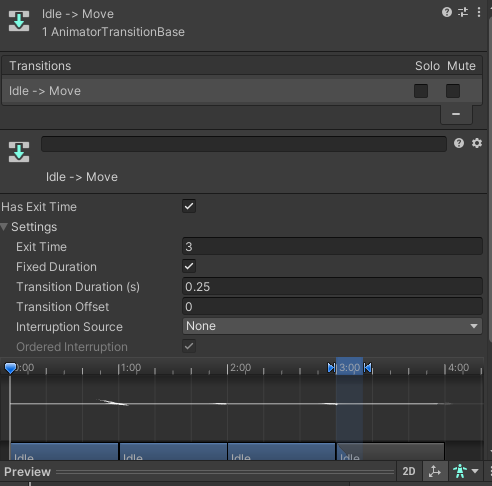
1. Has Exit Time 설정
특정동작이 동료되는 시간을 사용자가 직접설정해서 다음 분기의 동작이 실행되는 타이밍을 맞추는 것.

2. 애니메이션의 분기조건 설정
시간으로 정확한 타이밍을 설정할 수 없다면, 특정 조건을 설정해서 원하는 타이밍에 기계가 동작되도록 할 수 있다. if(조건문) {return;} 의 조건문과 같은 방법이라 볼 수 있다.
위 두가지를 적절히 활용하면 사용자가 원하는 타이밍에 애니메이션을 실행할 수 있다.
아래는 테스트 코드다.

관련코드
using System;
using System.Collections;
using System.Collections.Generic;
using UnityEngine;
using UnityEngine.AI;

public class Enemy_AI : MonoBehaviour
{
    [SerializeField] Transform target;
    [SerializeField] float chaseRange = 5f;
    NavMeshAgent navMeshAgent;
    float distanceToTarget = Mathf.Infinity;
    bool isProvoked = false;

    private void Start() {
        navMeshAgent = GetComponent<NavMeshAgent>();

    }

    private void Update() {
        distanceToTarget = Vector3.Distance(target.position, this.transform.position);
        if(isProvoked){
            EngageTarget();
        }
        else if(distanceToTarget <= chaseRange){
            isProvoked = true;

            // navMeshAgent.SetDestination(target.position);
        }
    }

    private void EngageTarget()
    {
        if(distanceToTarget >= navMeshAgent.stoppingDistance){
            ChaseTarget();
        }

        if(distanceToTarget <= navMeshAgent.stoppingDistance){
            AttackTarget();
        }
    }
    private void ChaseTarget()
    {
        GetComponent<Animator>().SetBool("attack", false);
        GetComponent<Animator>().SetTrigger("move");
        navMeshAgent.SetDestination(target.position);
    }

    // 조건을 설정해서 애니메이션을 분기하는 방법을 선택했다.
    private void AttackTarget()
    {
        GetComponent<Animator>().SetBool("attack", true);
        Debug.Log("Attack!");
    }

    void OnDrawGizmosSelected()
    {
        // Display the explosion radius when selected
        Gizmos.color = Color.red;
        Gizmos.DrawWireSphere(transform.position, chaseRange);
    }
}
#참조
https://docs.unity3d.com/Manual/AnimationClips.html
Unity - Manual: Animation Clips
Animation from external sources Animation Clips Animation Clips are one of the core elements to Unity’s animation system. Unity supports importing animation from external sources, and offers the ability to create animation clipsAnimation data that can be
docs.unity3d.com
https://docs.unity3d.com/Manual/AnimatorControllers.html
Unity - Manual: Animator Controllers
The Animator Controller Asset Animator Controllers An Animator ControllerControls animation through Animation Layers with Animation State Machines and Animation Blend Trees, controlled by Animation Parameters. The same Animator Controller can be referenced
docs.unity3d.com
https://docs.unity3d.com/kr/2021.3/Manual/class-Animation.html
Animation - Unity 매뉴얼
Unity의 현재 애니메이션 시스템이 등장하기 전 게임 오브젝트의 애니메이션을 위해 사용되었던 레거시 Animation 컴포넌트입니다.
docs.unity3d.com
[Unity] 애니메이션 (Animation, Animator, Legacy, Mecanim)
유니티에서 애니메이션을 다룰 때 다양한 키워드를 마주할 수 있을 것이다. 이번 포스트에선 유니티 애니메이션에서 알아두면 좋을 주요 키워드를 다룬다.
velog.io
'Unity' 카테고리의 다른 글
| Unity) Serializable, SerializeField (2) | 2023.10.23 |
|---|---|
| Unity) Event (2) | 2023.10.20 |
| Unity) RayCast (0) | 2023.10.18 |
| Unity) Draw gizmo selection (4) | 2023.10.17 |
| Unity) Realm Rush Defense Game (0) | 2023.10.16 |